Simplify your deployment with Traefik - A comprehensive walk-through
Deploying docker containers, managing routes, generating TLS certificates, and load balancing can be a hassle sometimes. It may become more difficult to manage all of this if you want to run multiple docker containers on the same host!
Solution? For running multiple services on the same host you can use a reverse proxy. A reverse proxy is a service running on your host machine which maps each public request to its corresponding backend service running on the same host. There are many reverse proxies out there. One of which is Traefik!
Traefik
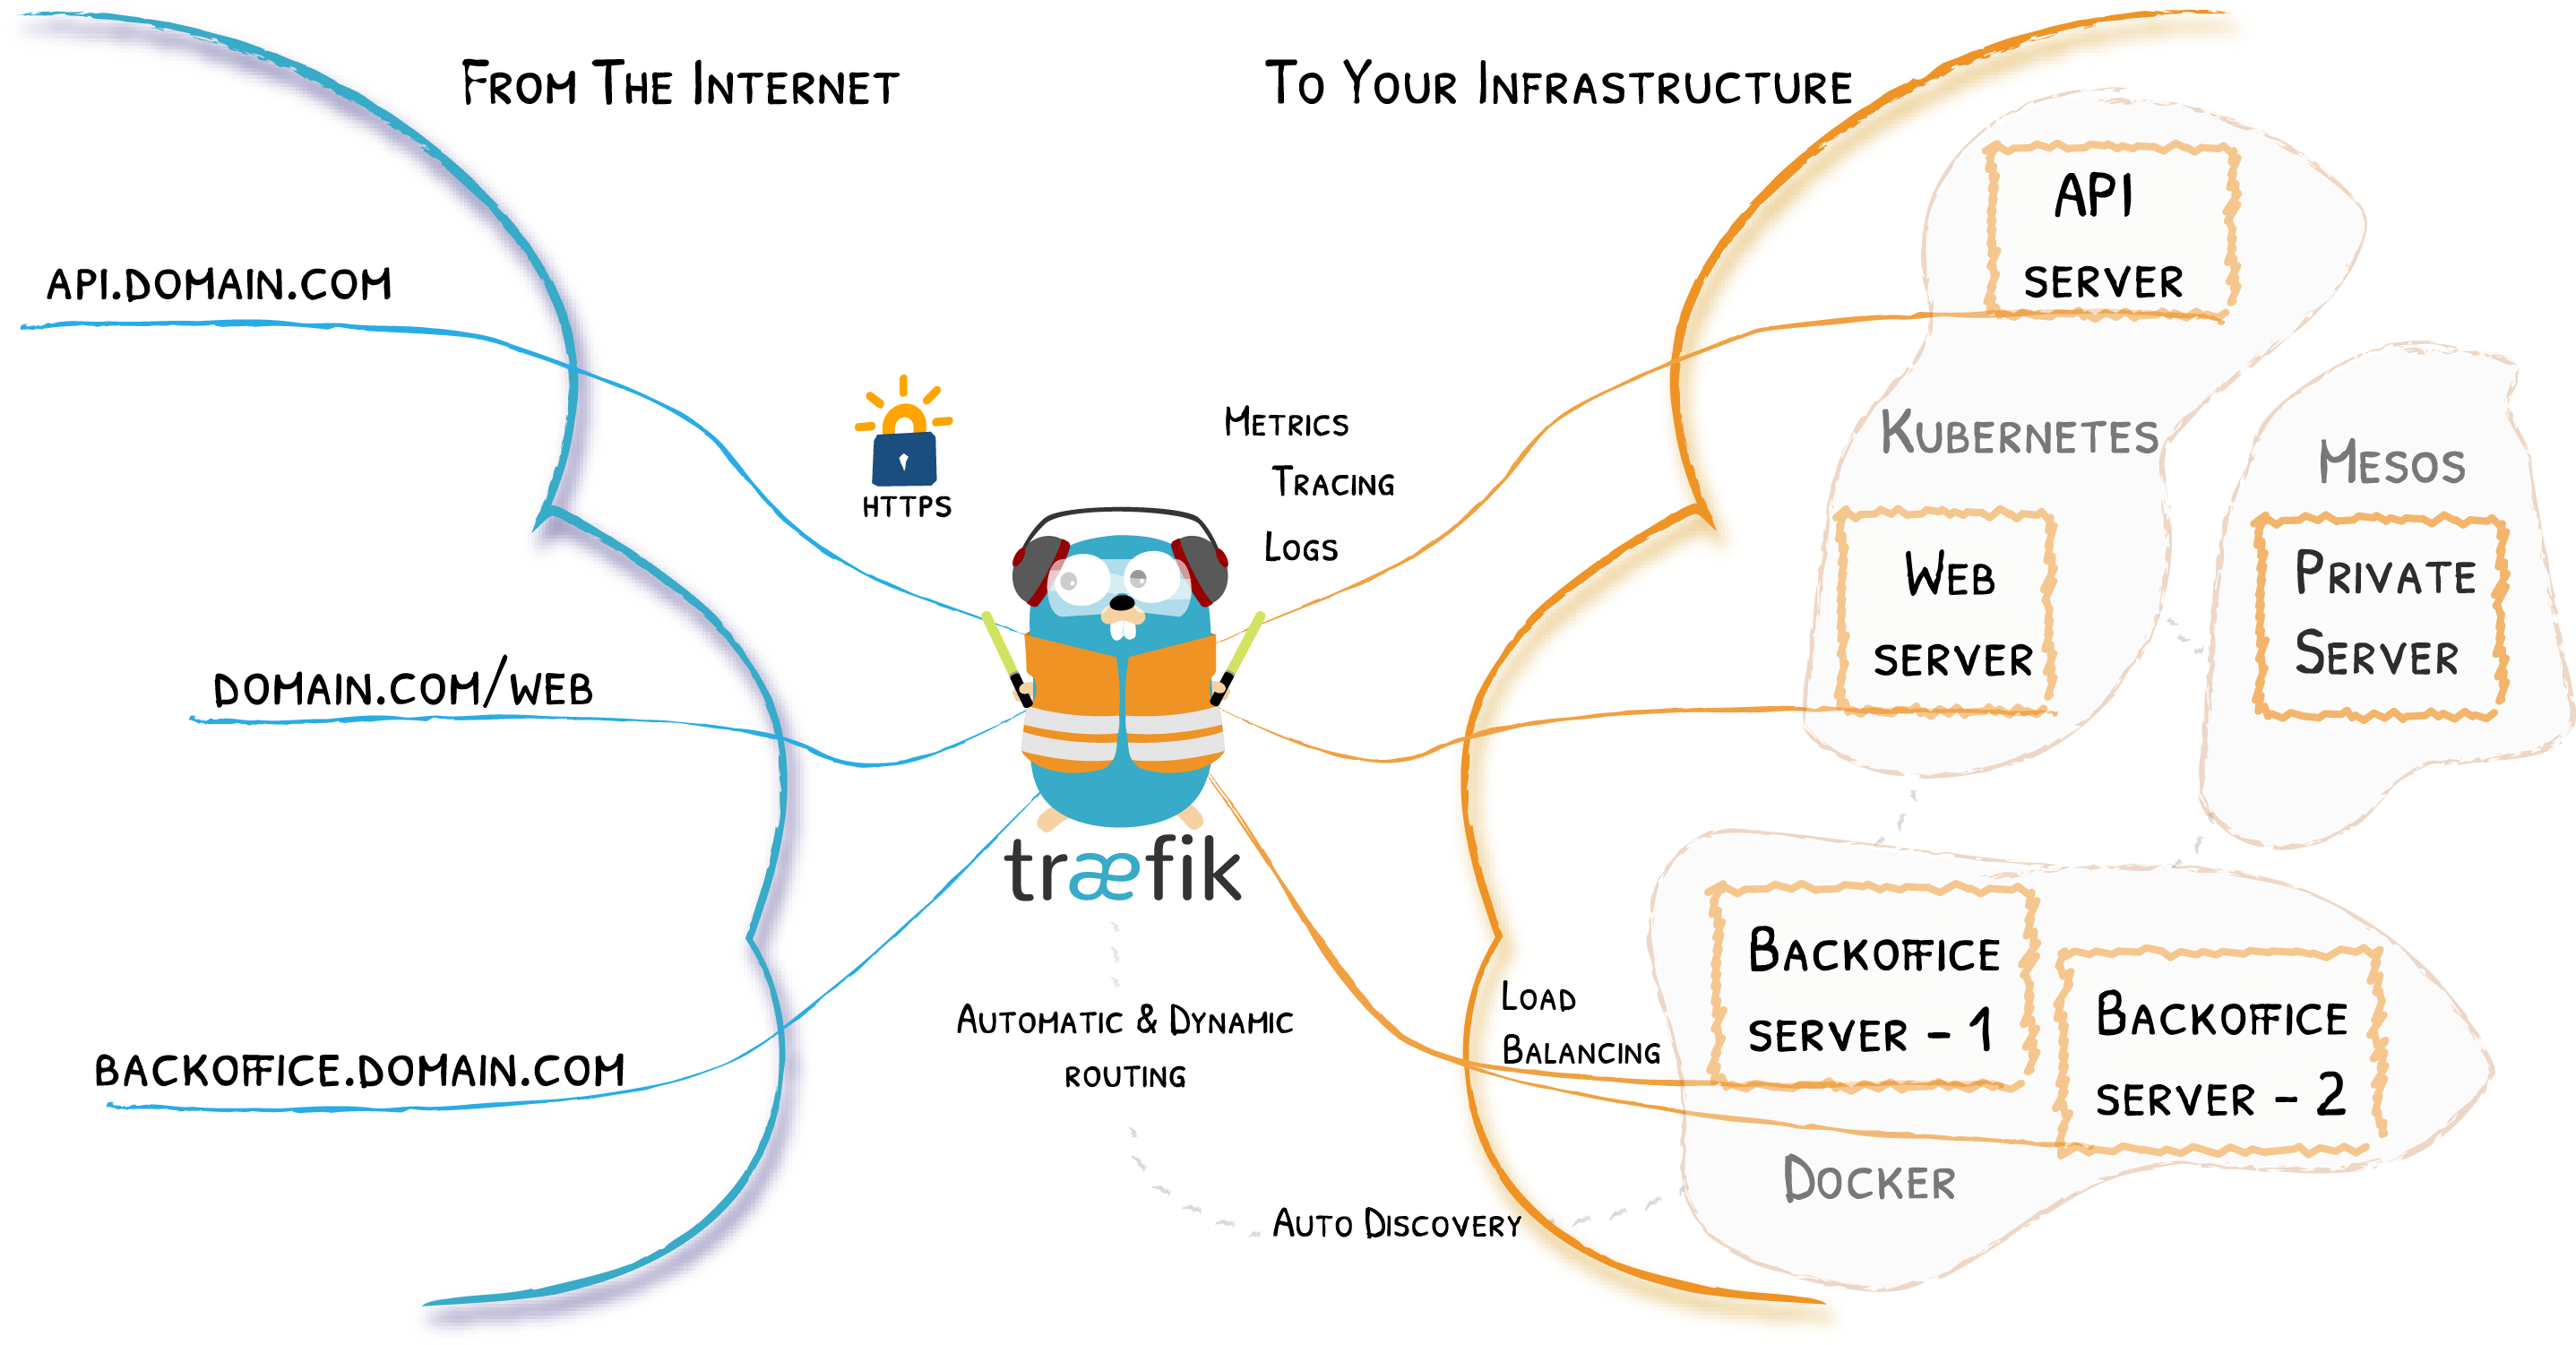
Traefik is an open-source router which takes care of reverse proxying requests, load balancing, TLS certificate generation (let's encrypt), etc. It supports HTTP, HTTP/2, TCP, UDP, Websockets, and gRPC protocols. It also has a clean and modern dashboard for monitoring. And adding to all these, it is way easier to use as compared to Nginx!
For more details: https://traefik.io/traefik/
In this post, I will guide you through setting up Traefik 2 and running a simple example Node.js app.
Prerequisites
For the sake of this post, I am going to use a VM instance from Oracle Cloud free tier (2 vCPU arm64, 8GB ram, Ubuntu 22.04). You are free to use whatever host you want.
Requirements:
- A Linux server with Docker installed. Having at least 2 GB of RAM will be better for running multiple containers. Though you can run it on an even smaller server.
docker-composeshould also be installed.- A domain name with a wildcard record pointing towards your server IP
Here is a sample DNS record which you can use to set up for your domain.
| Type | Name | Content | TTL |
|---|---|---|---|
| A | * | server.ip | Auto |
This will make *.example.com available for Traefik. This means you can route your apps and services with names like blog.example.com, forum.example.com, dashboard.example.com, etc.
If you don't want to make a wildcard record for the main domain name but instead for a subdomain then you can change the value under Name to *.subdomain . This will result in names like xyz.subdomain.example.com, dashboard.subdomain.example.com, etc.
Step-1
Before going any further we need to update our system.
sudo apt-get updateNow, you can install docker and docker-compose.
sudo apt-get install \
    ca-certificates \
    curl \
    gnupg \
    lsb-release && \
    sudo mkdir -p /etc/apt/keyrings && \
    curl -fsSL https://download.docker.com/linux/ubuntu/gpg | sudo gpg --dearmor -o /etc/apt/keyrings/docker.gpg && \
    echo \
    "deb [arch=$(dpkg --print-architecture) signed-by=/etc/apt/keyrings/docker.gpg] https://download.docker.com/linux/ubuntu \
    $(lsb_release -cs) stable" | sudo tee /etc/apt/sources.list.d/docker.list > /dev/null && \
    sudo apt-get update && \
    sudo apt-get install docker-ce docker-ce-cli containerd.io docker-compose-plugin docker-compose && \
    sudo groupadd docker || sudo usermod -aG docker $USER && \
    newgrp docker && \
    sudo systemctl enable docker.service && sudo systemctl enable containerd.service
(I have munched up all the commands in one single just to save some time. It even includes some post-installation steps)
Verify your docker installation by running the famous hello-world image
docker run hello-worldStep-2
Let's start with Traefik. Create a data folder for storing Traefik configuration file traefik.yml, acme.json for storing certificates and a configurations folder for storing dynamic configurations file dynamic.yml.
mkdir -p data/configurations && \
  touch data/traefik.yml && \
  touch data/acme.json && \
  touch data/configurations/dynamic.yml && \
  chmod 600 data/acme.json
Now create a docker-compose.yml for Traefik.
nano docker-compose.ymland add the following lines to docker-compose.yml
Replace traefik.yourdomain on line 25 with your dashboard URL.
Example: traefik.fossian.com or dash.fossian.com
version: '3.7'

services:
  traefik:
    image: traefik:v2.7
    container_name: traefik
    restart: always
    security_opt:
      - no-new-privileges:true
    ports:
      - 80:80
      - 443:443
    volumes:
      - /etc/localtime:/etc/localtime:ro
      - /var/run/docker.sock:/var/run/docker.sock:ro
      - ./data/traefik.yml:/traefik.yml:ro
      - ./data/acme.json:/acme.json
      - ./data/configurations:/configurations
    networks:
      - web
    labels:
      - "traefik.enable=true"
      - "traefik.docker.network=web"
      - "traefik.http.routers.traefik-secure.entrypoints=websecure"
      - "traefik.http.routers.traefik-secure.rule=Host(`traefik.yourdomain`)"
      - "traefik.http.routers.traefik-secure.middlewares=user-auth@file"
      - "traefik.http.routers.traefik-secure.service=api@internal"

networks:
  web:
    external: true
There's a lot of stuff going on here so let's understand some part of it.
We have passed no-new-privileges as true to avoid container processes from gaining additional privileges.
We have added docker.sock file in volumes so that Traefik can listen to all the changes happening to the containers. We have also added our configuration file traefik.yml and acme.json. We also added the path to our dynamic configuration file.
We have also set the network to web.
Then comes the labels. We have defined traefik.docker.network to web. We have defined entrypoint to websecure which listens on port 443. Then we have defined a rule for our Traefik dashboard.
Now let's edit Traefik configuration file traefik.yml.
nano ./data/traefik.ymland add the following to it
Replace admin@yourdomain on lines 34 and 42 with your personal or website email. It will be used by Let's Encrypt to notify you regarding the expiration of TLS certificates. Nonetheless, you don't have to worry about regenerating certificates as Traefik will do it for you automatically.
api:
  dashboard: true

entryPoints:
  web:
    address: :80
    http:
      redirections:
        entryPoint:
          to: websecure

  websecure:
    address: :443
    http:
      middlewares:
        - secureHeaders@file
        - nofloc@file
      tls:
        certResolver: letsencrypt

pilot:
  dashboard: false

providers:
  docker:
    endpoint: "unix:///var/run/docker.sock"
    exposedByDefault: false
  file:
    filename: /configurations/dynamic.yml

certificatesResolvers:
  letsencrypt:
    acme:
      email: admin@yourdomain
      storage: acme.json
      keyType: EC384
      httpChallenge:
        entryPoint: web

  buypass:
    acme:
      email: admin@yourdomain
      storage: acme.json
      caServer: https://api.buypass.com/acme/directory
      keyType: EC256
      httpChallenge:
        entryPoint: web
Now edit dynamic.yml
nano ./data/configurations/dynamic.ymland add the following to it
http:
  middlewares:
    nofloc:
      headers:
        customResponseHeaders:
          Permissions-Policy: "interest-cohort=()"
    secureHeaders:
      headers:
        sslRedirect: true
        forceSTSHeader: true
        stsIncludeSubdomains: true
        stsPreload: true
        stsSeconds: 31536000

    # Generate yours using htpasswd
    # UserName : admin
    # Password : fossian
    user-auth:
      basicAuth:
        users:
          # Generate using "htpasswd -nb admin secure_password"
          - "admin:$apr1$B5scLRiX$ivpndRS3XuqZ05oaDgHql0"

tls:
  options:
    default:
      cipherSuites:
        - TLS_ECDHE_ECDSA_WITH_AES_256_GCM_SHA384
        - TLS_ECDHE_RSA_WITH_AES_256_GCM_SHA384
        - TLS_ECDHE_ECDSA_WITH_AES_128_GCM_SHA256
        - TLS_ECDHE_RSA_WITH_AES_128_GCM_SHA256
        - TLS_ECDHE_ECDSA_WITH_CHACHA20_POLY1305
        - TLS_ECDHE_RSA_WITH_CHACHA20_POLY1305
      minVersion: VersionTLS12
To change the password install htpasswd which is a part of apache2-utils package.
sudo apt-get install apache2-utilsThen run this (make sure you replace secure_password with your password)
htpasswd -nb admin secure_passwordThis will return you something like this: admin:$apr1$L0VB4It1$Yx4tfFO26W68ikz/6VZOG1
You can now replace the old one (line 22) with your newly generated one.
Step-3
Now all the things are set. Just one more thing to do before running your shiny Traefik container, i.e., Creating the docker network web which we provided in the docker-compose.yml.
First, check if the network web is there or not.
docker network lsIf there is a network named web then you can skip the below command otherwise run it to make one.
docker network create webWhen we will run other containers we can add them to this network so that Traefik can proxy them.
Now everything is set.
Run the Traefik container using docker-compose
docker-compose up -dIf everything goes well you can access your Traefik dashboard at traefik.yourdomain or the URL which you added in place of that.
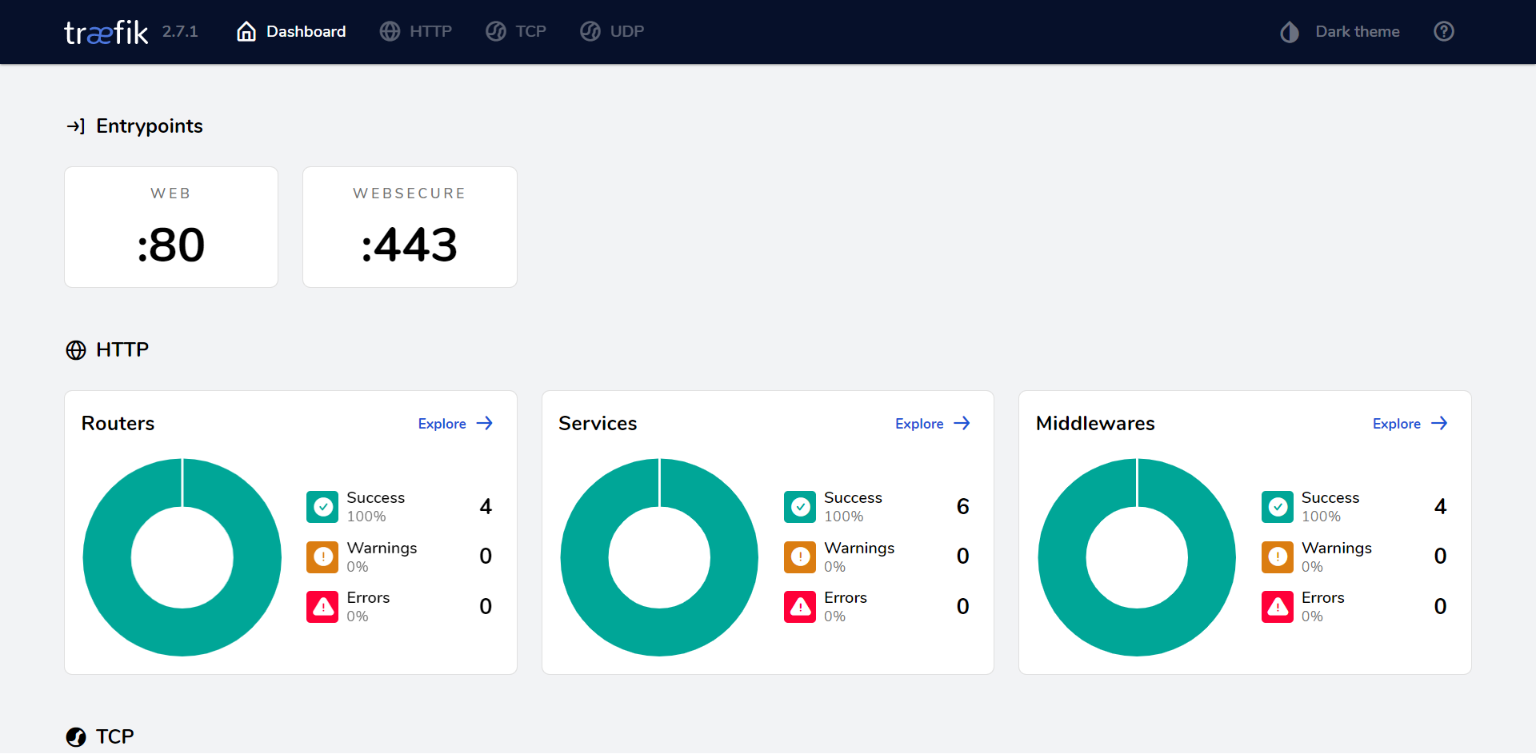
There you have your own reverse proxy setup and running.
After setting Traefik, adding new docker containers is easy. You just have to define some labels and you are good to go.
Step-4: Hosting a node.js express webapp
We are going to deploy a simple node.js express web app.
Github: https://github.com/fossian-com/sample-webapp-nodejs
First, clone it to your server.
git clone https://github.com/fossian-com/sample-webapp-nodejsNow, cd into the directory sample-webapp-nodejs and create a docker-compose.yml file.
cd sample-webapp-nodejs && nano docker-compose.ymland add the following
Make sure you replace nodeapp.yourdomain at line 21 with the URL you want.
Example: nodeapp.fossian.com or express.fossian.com
version: '3'

services:
  nodejsapp:
    # image: image-name:tag
    build: .
    container_name: sample-webapp-nodejs
    environment:
      PORT: 8080
    networks:
      - web
    restart: always
    labels:
      # Allow Traefik to access the container
      - "traefik.enable=true"
      # Tells Traefik to look in web to find the internal IP of the container
      - "traefik.docker.network=web"
      # Entrypoints to websecure i.e., port 443
      - "traefik.http.routers.ghost-secure.entrypoints=websecure"
      # Rule for the url for webapp container
      - "traefik.http.routers.ghost-secure.rule=Host(`nodeapp.yourdomain`)"

networks:
  web:
    external: true
Now simply run
docker-compose up -dand after successful deployment access your app at nodeapp.yourdomain or the URL which you provided.
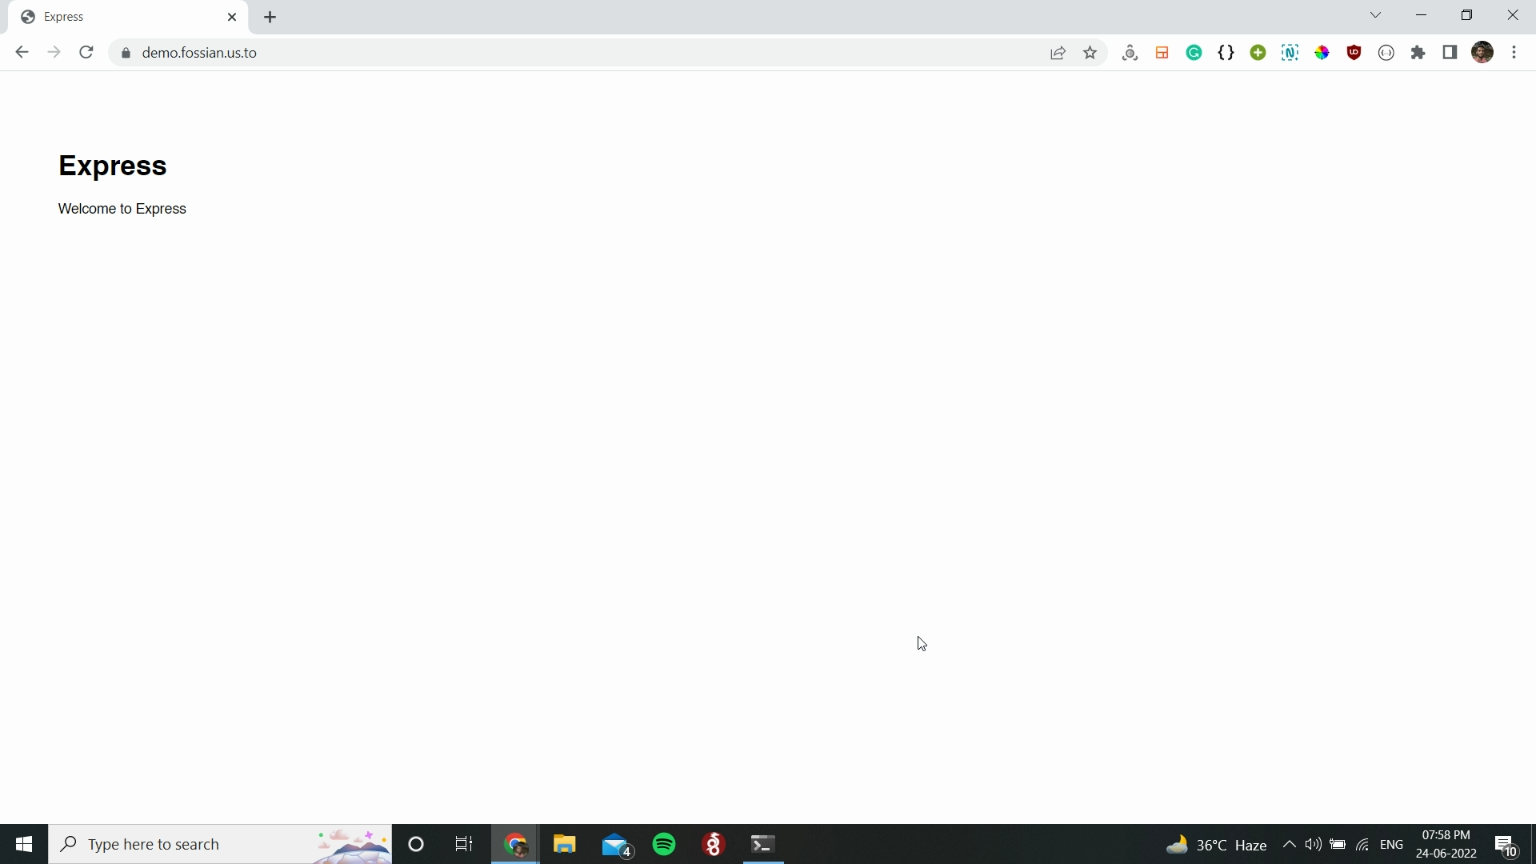
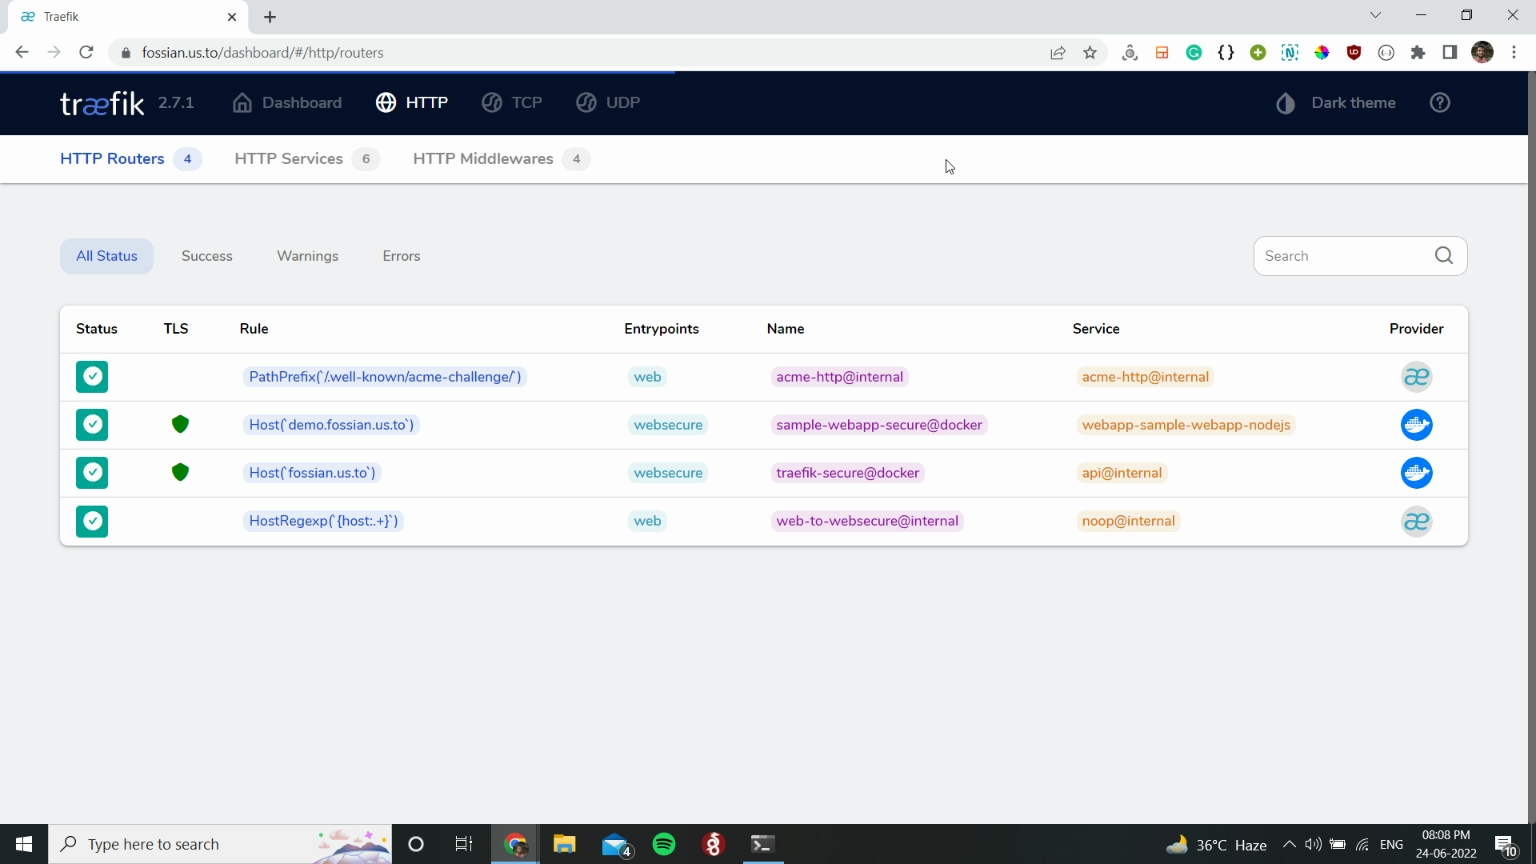
You can also see on your Traefik dashboard that a new route has been added.
If you plan to run a full-fledge Nodejs app with database support then make sure you add a db service in docker-compose under the same network with the Nodejs app.
For example:
version: '3'

services:
  db:
    image: mariadb
    container_name: webapp-db
    volumes:
      - db-data:/var/lib/mysql
    networks:
      # For accepting communication from the webapp
      - default
    restart: always
    environment:
      MYSQL_ROOT_PASSWORD: rootpassword
      MYSQL_DATABASE: db
      MYSQL_USER: dbuser
      MYSQL_PASSWORD: dbpassword

  nodejsapp:
    depends_on:
      - db
    # image: image-name:tag
    build: .
    container_name: sample-webapp-nodejs
    environment:
      PORT: 8080
      DB_HOST: db:3306
      DB_NAME: db
      DB_USER: dbuser
      DB_PASSWORD: dbpassword
    networks:
      # For communicating with the db
      - default
      - web
    restart: always
    labels:
      # Allow Traefik to access the container
      - "traefik.enable=true"
      # Tells Traefik to look in web to find the internal IP of the container
      - "traefik.docker.network=web"
      # Entrypoints to websecure i.e., port 443
      - "traefik.http.routers.ghost-secure.entrypoints=websecure"
      # Rule for the url for webapp container
      - "traefik.http.routers.ghost-secure.rule=Host(`nodeapp.yourdomain`)"

volumes:
  db-data:
    # Naming the database volume
    name: nodejs-webapp-db-data
networks:
  web:
    external: true
Conclusion
In this tutorial, we installed Traefik, ran a simple web app container and learnt how to reverse proxy it with Traefik using a few lines of code.
You could have done the same with Nginx but it wouldn't be this easy! Traefik handles everything on its own and you don't have to restart it every time you deploy or make any changes to any running container. With just a few lines in docker-compose.yml, we were able to reverse proxy the web app and even secure it with a TLS certificate.
You can learn more about Traefik here: Traefik Proxy Documentation.